Designing a Raspberry Pi Arcade Cabinet
in Modeling on June 8, 2015 | CAD Arcade Solidworks MAME Retro
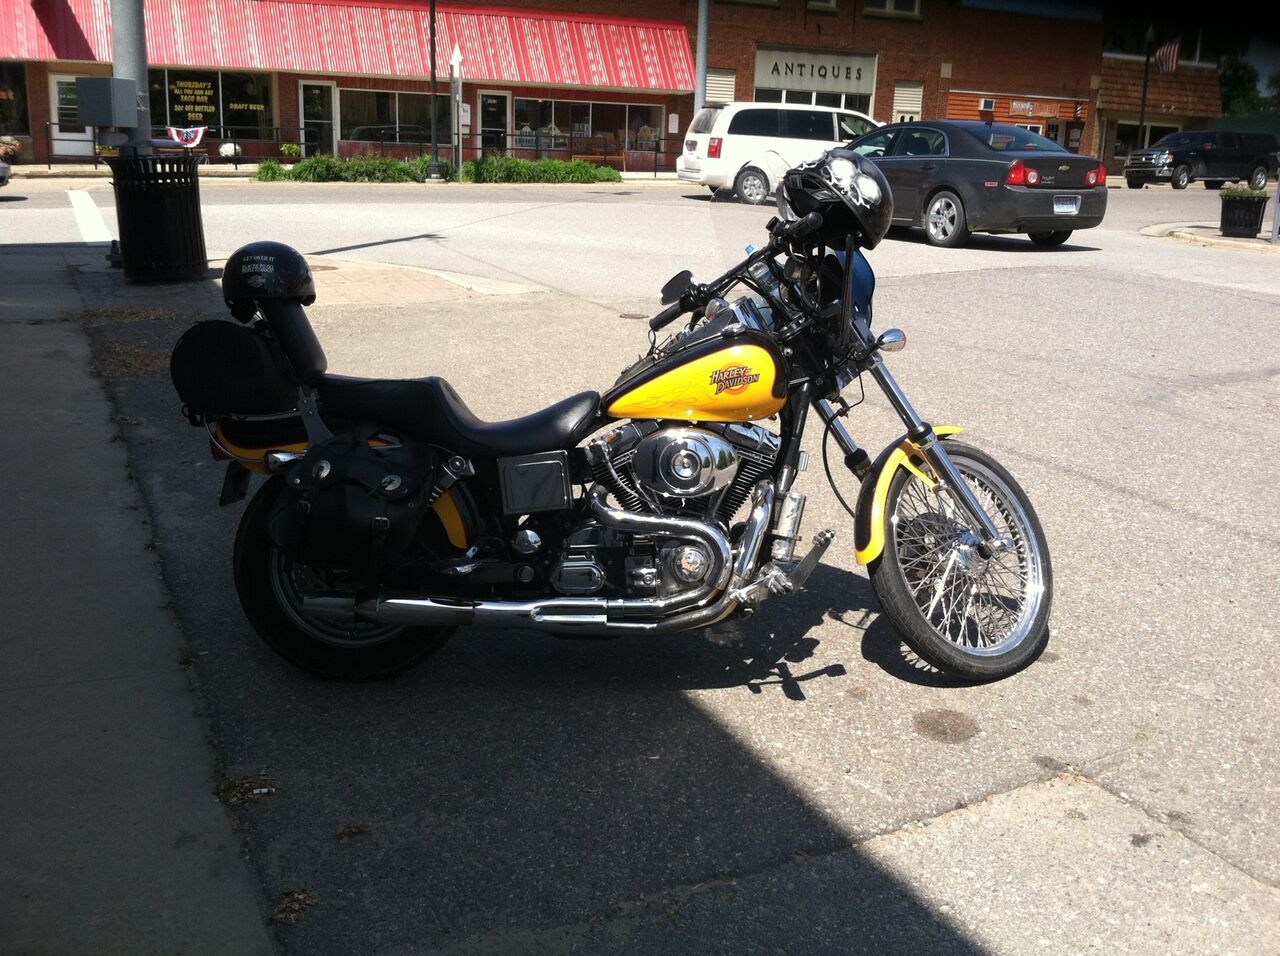
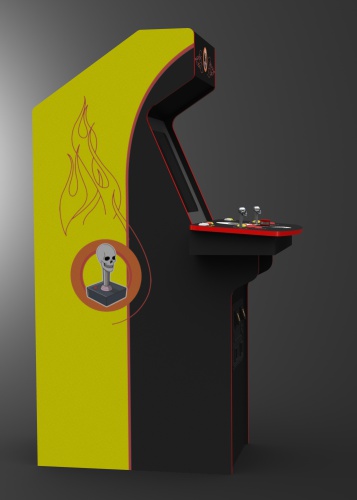
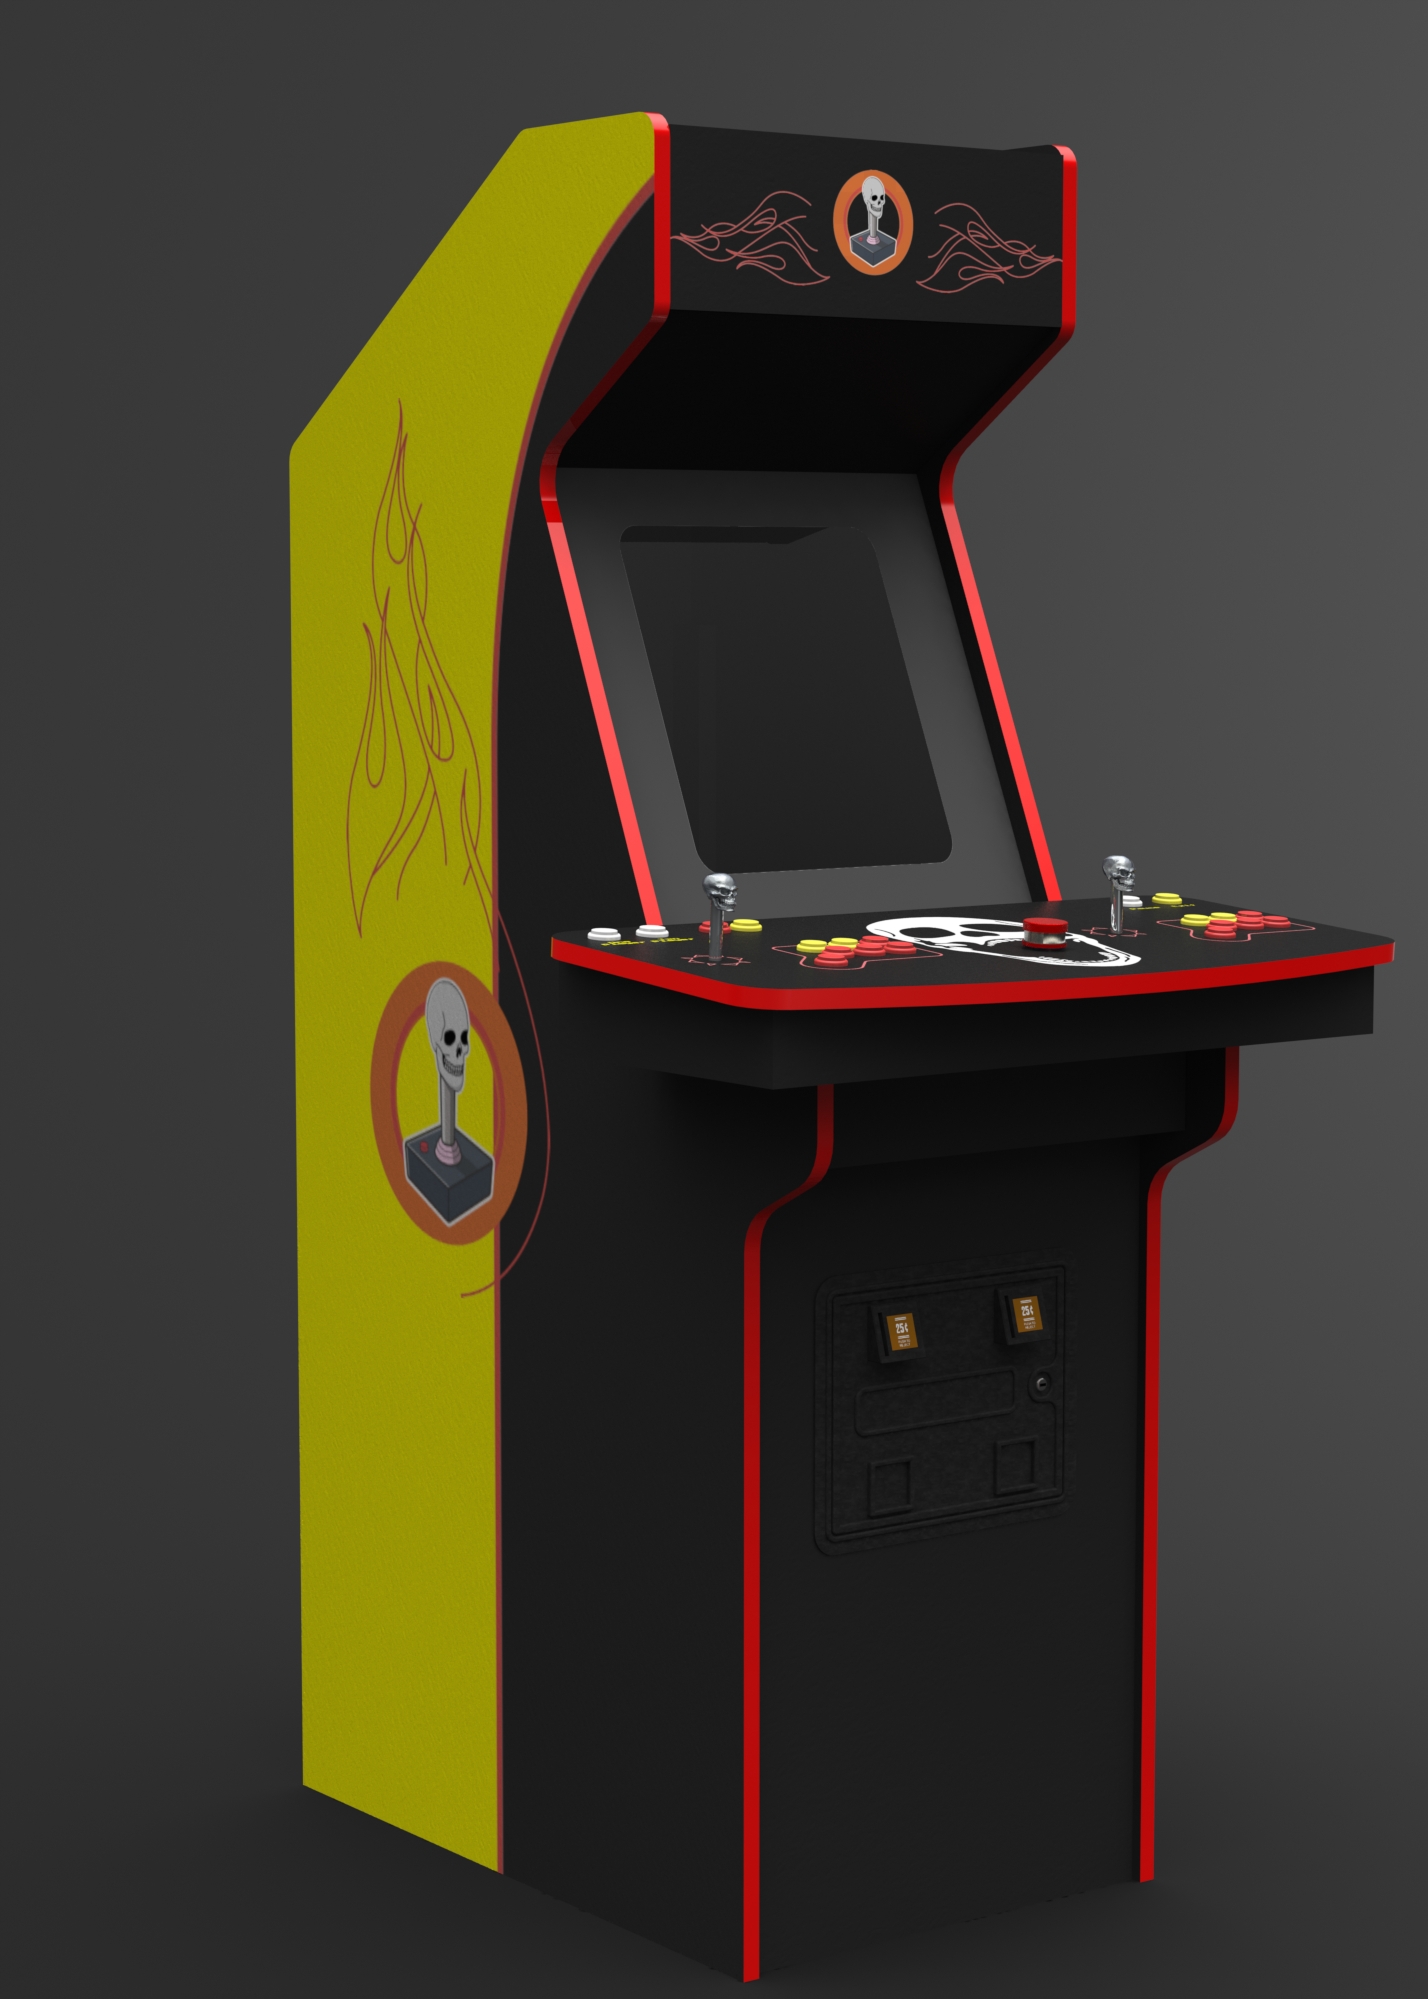
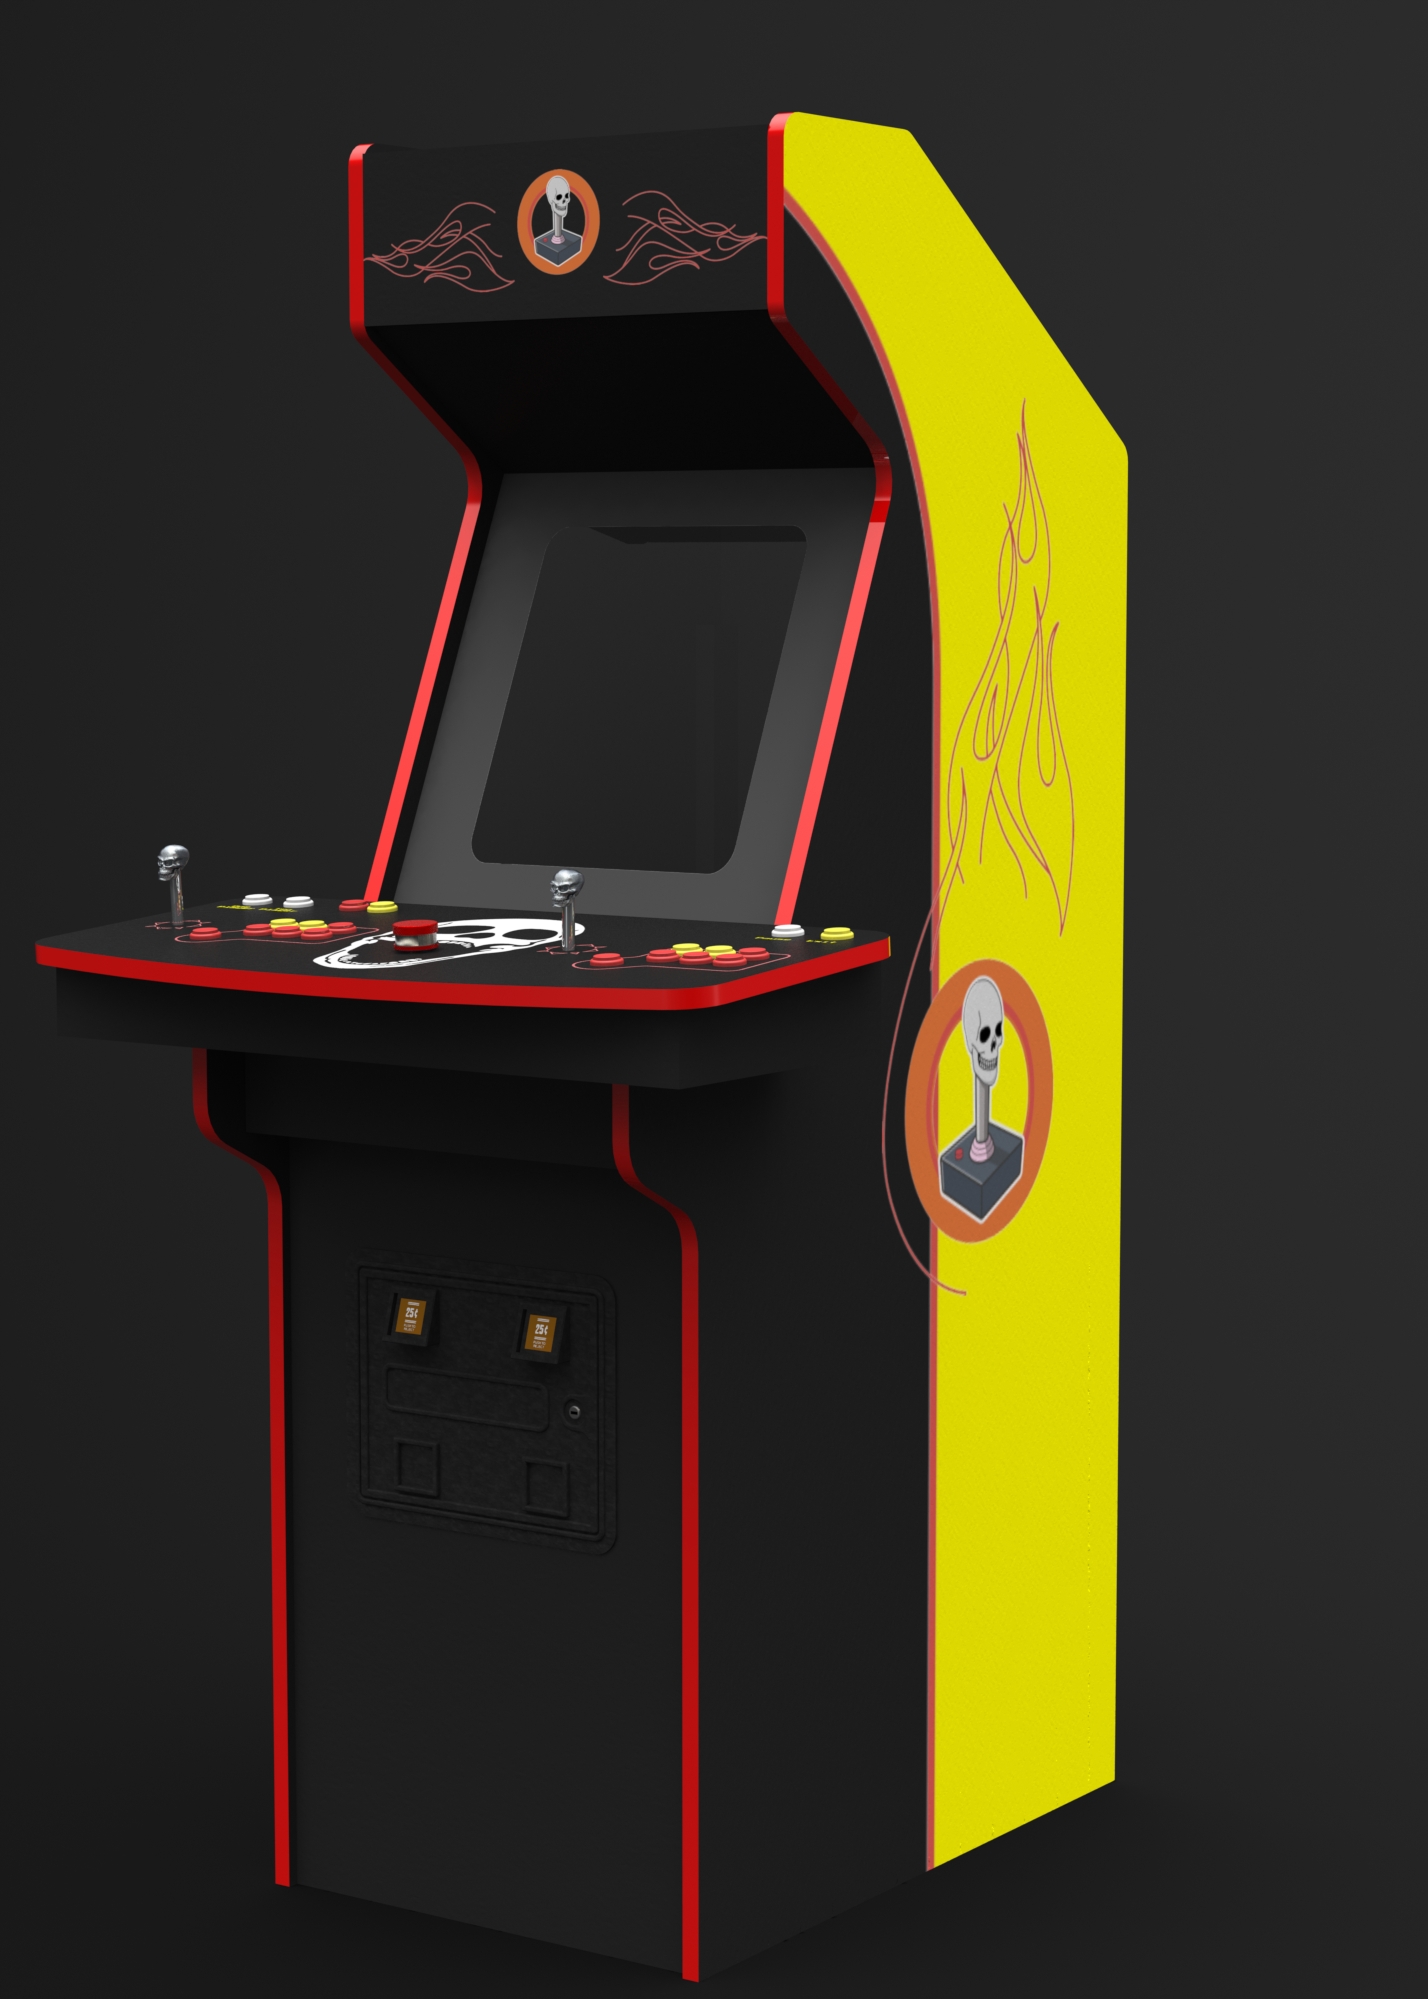
A few years ago I moved to Colorado to work at SparkFun and postponed a project I had been working on: Building a full size MAME arcade cabinet. A couple of months ago I decided I was going to pick the project back up and plan it so that I could work on it with my dad during my 4th of July vacation. I wanted to use his motorcycle as design inspiration for the cabinet.


When starting a large project such as this one, I always spend tons of time reading everything I can come across related to the topic at hand. However, for the most part I kept coming back to just a few resources during the design process:
Overall Shape and Construction
For the shape I went with something in-between the arcadecab design and David’s design. For construction I am going to follow David’s lead. I will use threaded wood inserts and many dado joints, including the monitor bezel to prevent light leak. It is important to know what monitor you intend to use so that you can properly adjust the width of the cabinet.
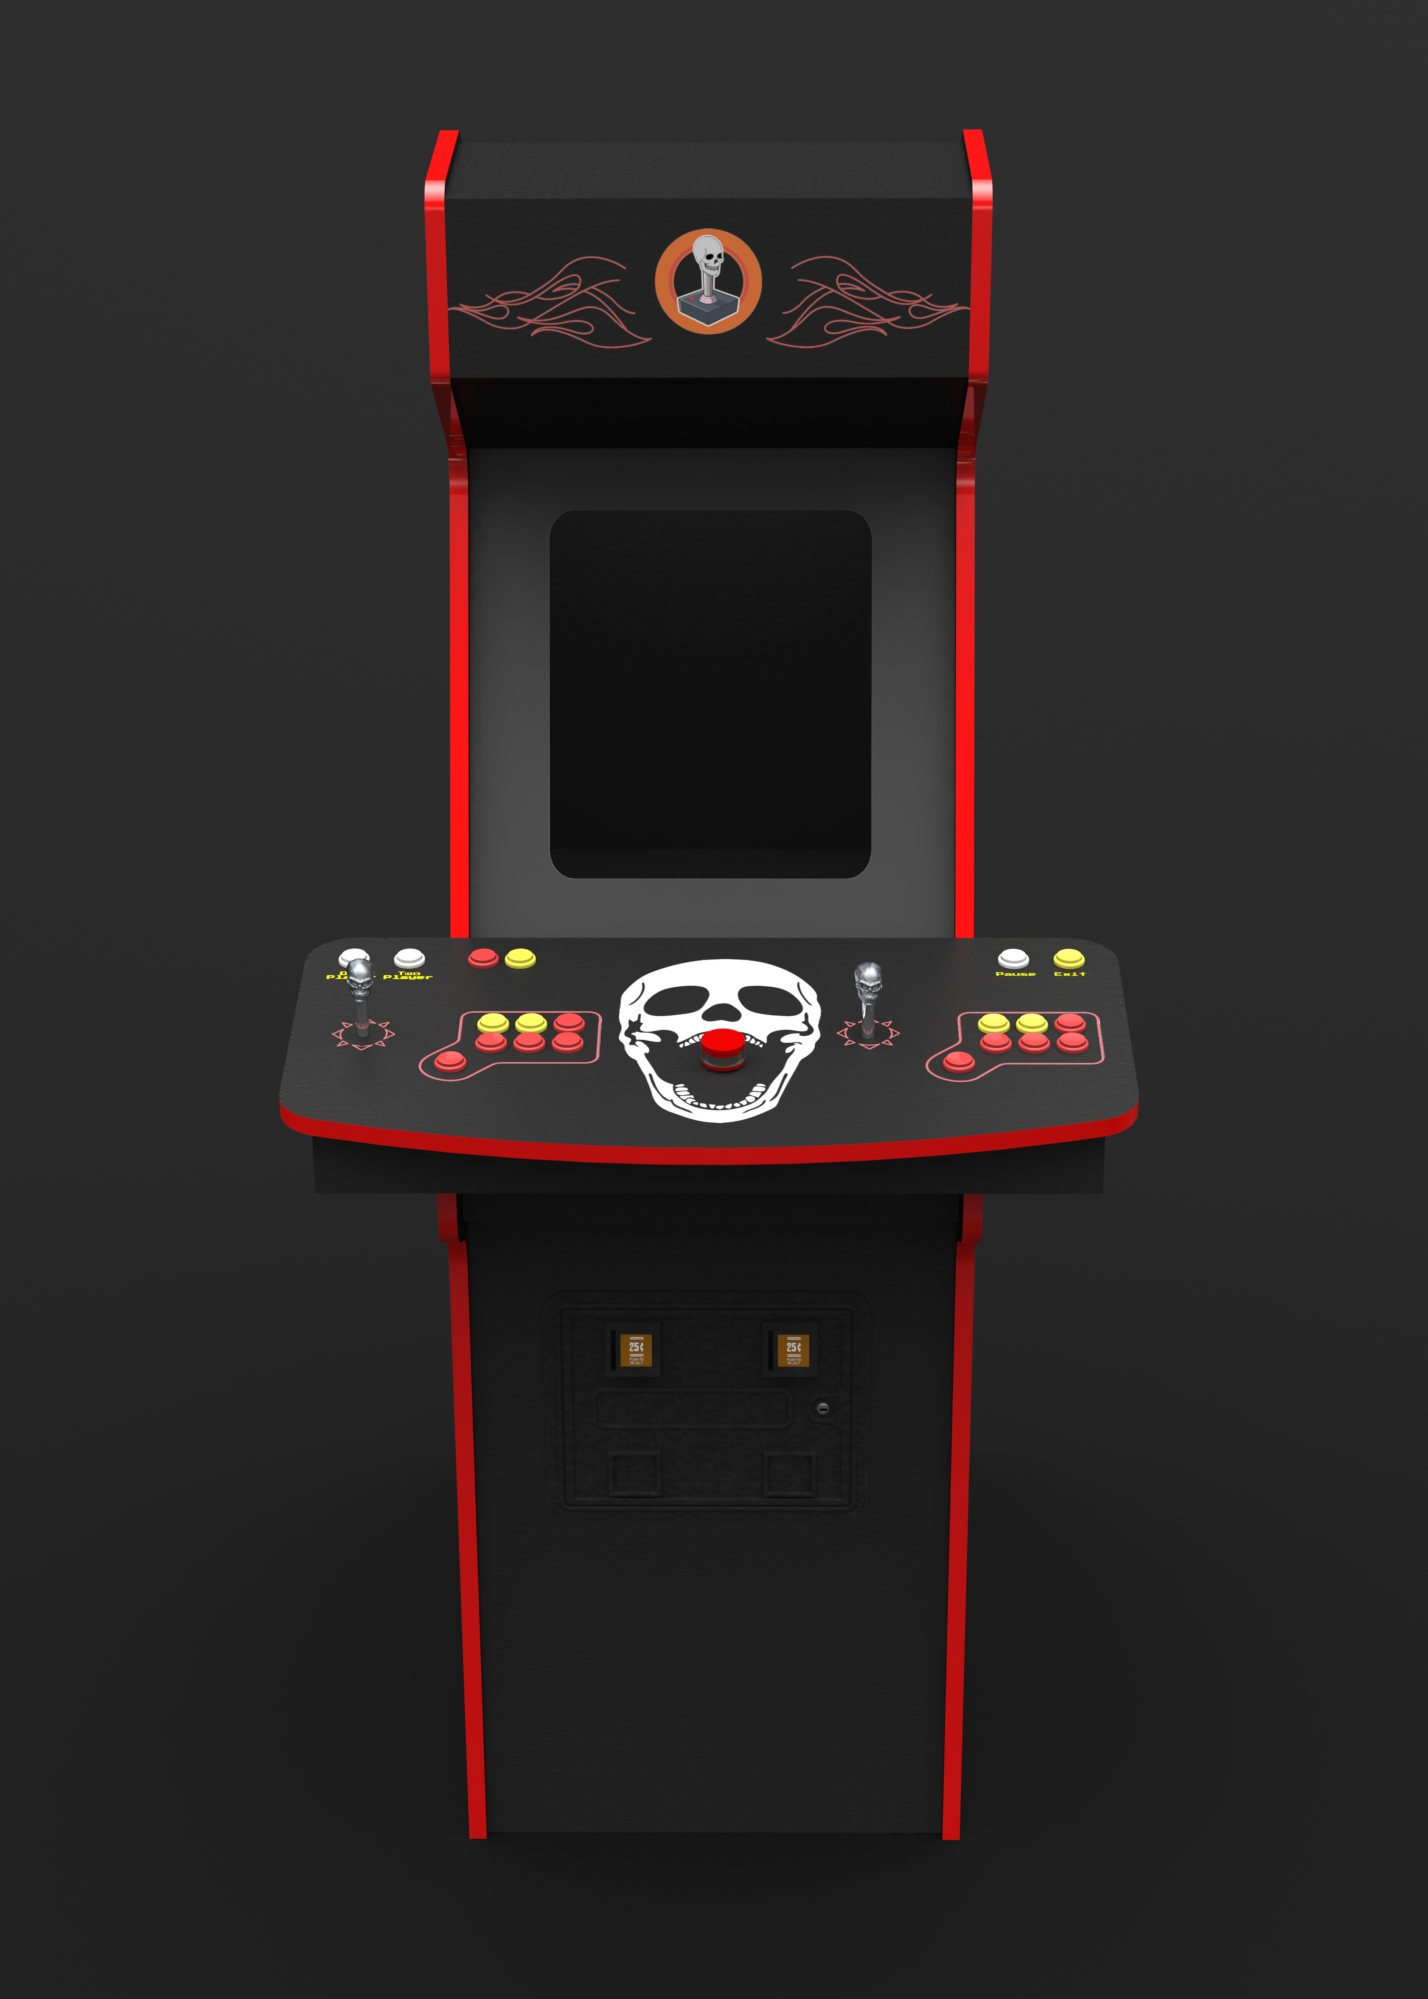
Control Panel
Arguably, the most important part of the cabinet. I had a hard time laying out the components and designing the graphics of this part of the cabinet. Luckily, there are many fantastic examples of this, just look at this beautiful control panel from David’s cabinet.
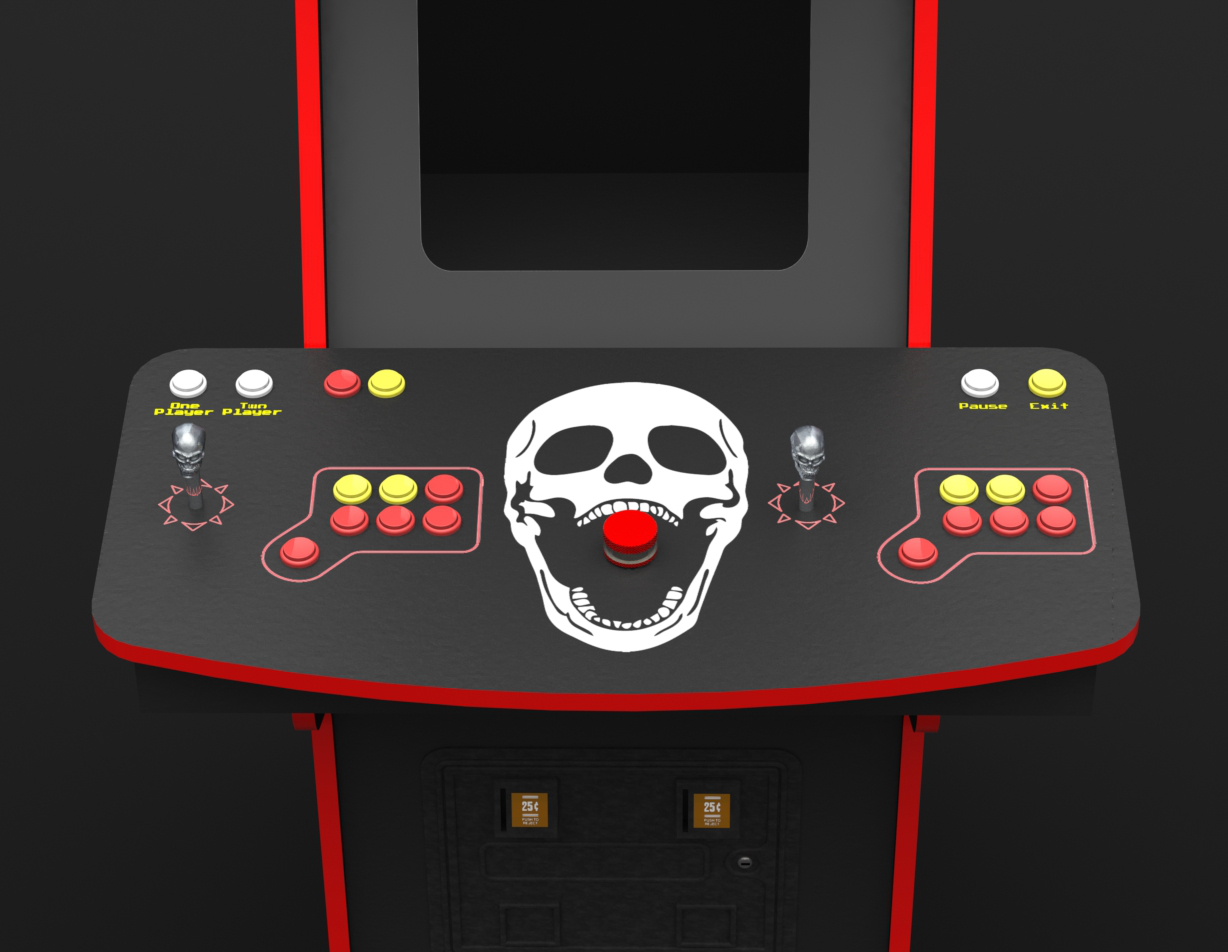
- I decided to go with two joysticks from Ultimarc that have the capability to switch between 4 and 8 directions from the top of the control panel.
- The trackball was left out because I don’t really enjoy the games that utilize it. Last year I wrote a Tempest clone but I’ve never played it on a cabinet so a spinner was a must have.
- I went with David’s button layout but I am still considering a last minute change to this one.
- There will be a plexy cover for the controls — I did not model it because I am lazy.
Hardware
For hardware I plan to use an Raspberry Pi and connect the controls via an I-PAC. There are a few YouTube videos that make this look rather promising but I have not tested it myself just yet. My cabinet will include a coin mech but it is actually illegal to take money on a MAME cabinet.
Software
Pretty simple, just going to use Retropie.
Design
I don’t consider myself the best designer but I have spent a lot of time on this and gotten input from many talented people. For the graphics I will have vinyls professionally made. I don’t want any of my graphics to contain black. I hope to spray paint all black on the cabinet (I have had good success at making spray paint look like a powder coat in the past) and the graphics will be laid on top of that. Red T-molding will be purchased from t-molding.com.
What do you think? Do you have any recommendations on how I can improve the cabinet before I start the build?
Comments (2)
Kyle
Thursday, Oct 10, 2019
James Kiefer
In reply to Kyle
Saturday, Oct 12, 2019
Thank you
Your comment has been submitted and will be published once it has been approved.
OOPS!
Your comment has not been submitted. Please go back and try again. Thank You!
If this error persists, please open an issue by clicking here.
Say something